It was winter break 2010 that I decided that staying home, playing cards and sipping hot cocoa by the fireplace wasn’t enough to constitute the lasting memories I envisioned my children fondly cherishing into adulthood. And so I decided to travel into NYC on the most heavily traveled, tourist saturated, gridlock day available…..after a massive snowstorm…..alone…..with four children. I’m not really sure what I was thinking, but I had a mission. I was out to create memories. And that I did.
It was not like I was holding these tickets for a long time. I specifically sent my mom and dad out earlier that day where they purchased half price tickets to Rock of Ages based on the advice of the guy standing next to them. He touted the play as hilarious and appropriate for all ages. I guess that’s why there are so many different books on parenting. The plan was to meet at 4:00 for a leisurely dinner and then merrily waltz into the theater before curtain time smiling, happy, relaxed, practically skipping and oozing with love and good memories. The reality was that we barely made the show on time and we were certainly less than merry.
The Daily News described it as the sixth largest snowstorm in New York history which “buried the streets in four-foot drifts, brought transit to a halt and spread a strange and wonderful hush over the city.” Days after the Blizzard of 2010, where 18 to 24 inches of snow accumulated across the tiny island of Manhattan, was the day I decided to create memories. I guess I chose this day for the same unknown reason I would, as a little girl, only wear turtlenecks in winter. From the front seat of my mini van, I threw packets of stale nuts and lollipops at my whining, hungry children. My youngest daughter, then 6 years old, cried “mommy, I’m scared!” as I held down my horn screaming obscenities at the car and traffic guard in front of me. We ran into the theater, out of breath, cranky and hungry with four bagels and cream cheese smuggled in my bag from the deli next door.
I guess I had created a memory. Not the loving one that formed in my mind, but the crazy, hectic one that backfires whenever I put the expectation of perfect in front of me. This winter break I have made no grand plans. In fact, I may not even leave the house. I will try to take what comes with gratitude and appreciation for the moment while baking a dessert I have already tried.
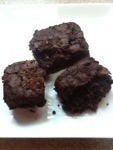
Brownies from The Longevity Kitchen by Rebecca Katz
Ingredients:
1/3 cup almond flour, homemade or store-bought (I used Trader Joe’s almond meal)
1/3 cup brown rice flour (for brownies that are more fudgy, replace the rice flour with another 1/3 cup of almond flour – this was what I did)
2 tablespoons natural unsweetened cocoa powder (I used raw cacao powder)
1/2 teaspoon ground cinnamon
1/2 teaspoon baking soda
1/8 teaspoon sea salt
8 ounces dark chocolate (68 to 72% cacao content), chopped
1/3 cup extra-virgin olive oil
2 organic eggs
1/3 cup Grade B maple syrup
1/3 cup maple sugar
(or light brown sugar)
1 teaspoon vanilla extract
1/2 cup coarsely chopped walnuts (I left these out because my children insisted)
Directions:
Preheat the oven to 350°F. Line an 8-inch square baking pan with two pieces of foil long enough to overlap on all four sides. Lightly oil the foil. (I just oiled my brownie pan and put the batter in)
Put the almond flour, brown rice flour, cocoa powder, cinnamon, baking soda, and salt in a bowl and stir with a whisk to combine.
Put half of the chocolate in a heatproof bowl and set the bowl over a saucepan of simmering water. Heat, stirring often, just until the chocolate is melted and smooth. (I melted my chocolate in the microwave) Remove from the heat and whisk in the olive oil.
Crack the eggs into a large bowl and whisk until frothy. Slowly add the maple syrup and maple sugar, whisking all the while, and continue whisking until the mixture is smooth. Add the vanilla extract, then gradually add the chocolate, whisking vigorously all the while, and continue whisking until smooth and glossy.
Add the flour mixture and beat for about 1 minute. Stir in the remaining chocolate and the walnuts. Scrape the mixture into the prepared pan and smooth the top with a spatula.
Bake for 30 minutes or until a toothpick inserted in the center comes out clean.
Let cool to room temperature in the pan, then cover and refrigerate for at least
one hour before cutting into brownies. (Of course, I skipped the refrigeration part and the brownies did crumble, but they were still delicious!)
Wishing all safe, imperfect, happy holidays filled with joy and appreciation,
Adina Kelman
Holistic Health Coach
www.alifeinbalance.co

